A creative design with Luja Paint. Creating a personalised design to your bathroom is a great way to add some drama to a small space.
This stylish design was achieved with some black and white paint, and a simple household sponge to create the pattern.
Our Luja hygiene range was used throughout this space. Luja is an ideal bathroom paint choice for rooms that are subject to high levels of moisture and humidity, such as bathrooms and kitchens. It's easy to clean, durable and provides long-lasting, high-quality results.
The white background was created with shade F497 Paper, and shade Y498 Midnight was used for the black pattern on top. Both these colours are part of the Tikkurila Feel the Colour collection.
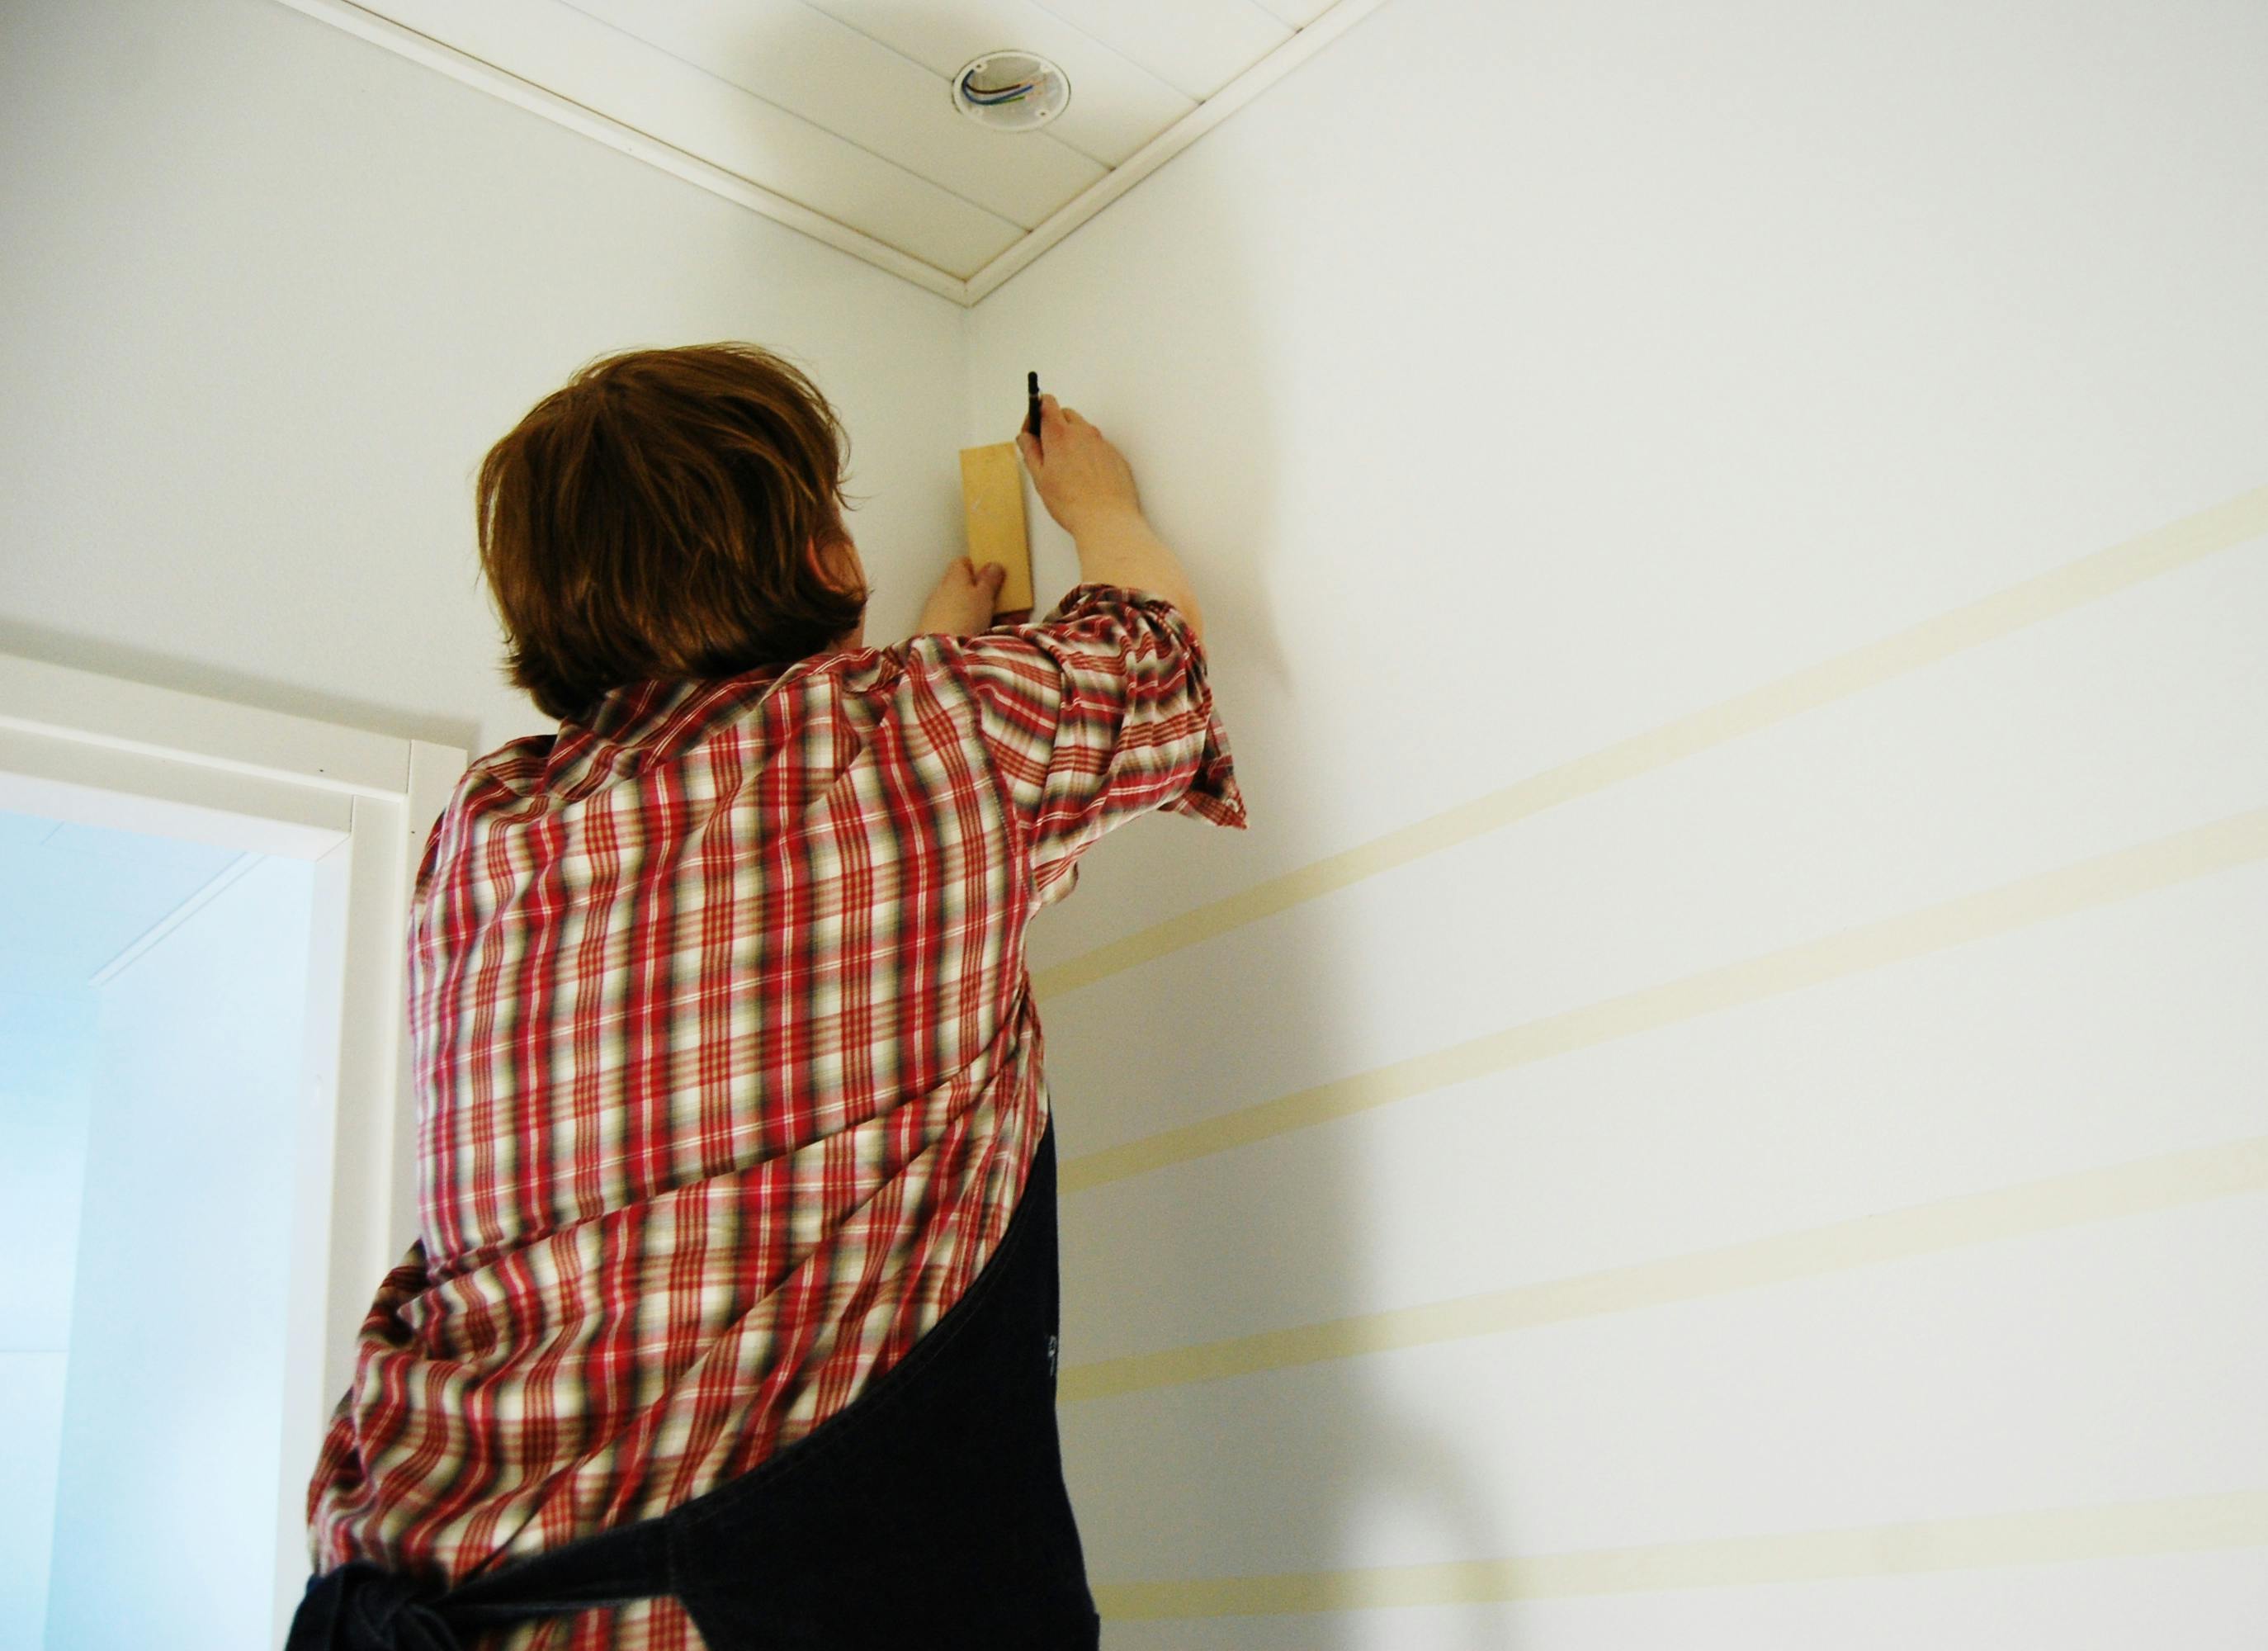
Work out the height of your chosen pattern detail. In this case, the sponge being used was 15 cms.
Combine this measurement with the thickness of your chosen masking tape. For example, we were using a 2.5cm tape, so our total measurement was 17.5cm.
Measure the total height of your wall.
Work out how many rows you would like to create and divide the total wall height by your pattern measurement (17.5cms)
To stop the last row from being split in half, make sure the wall's height includes an even number of pattern rows. Adapt the pattern's height to the number of rows that will fit on the wall.
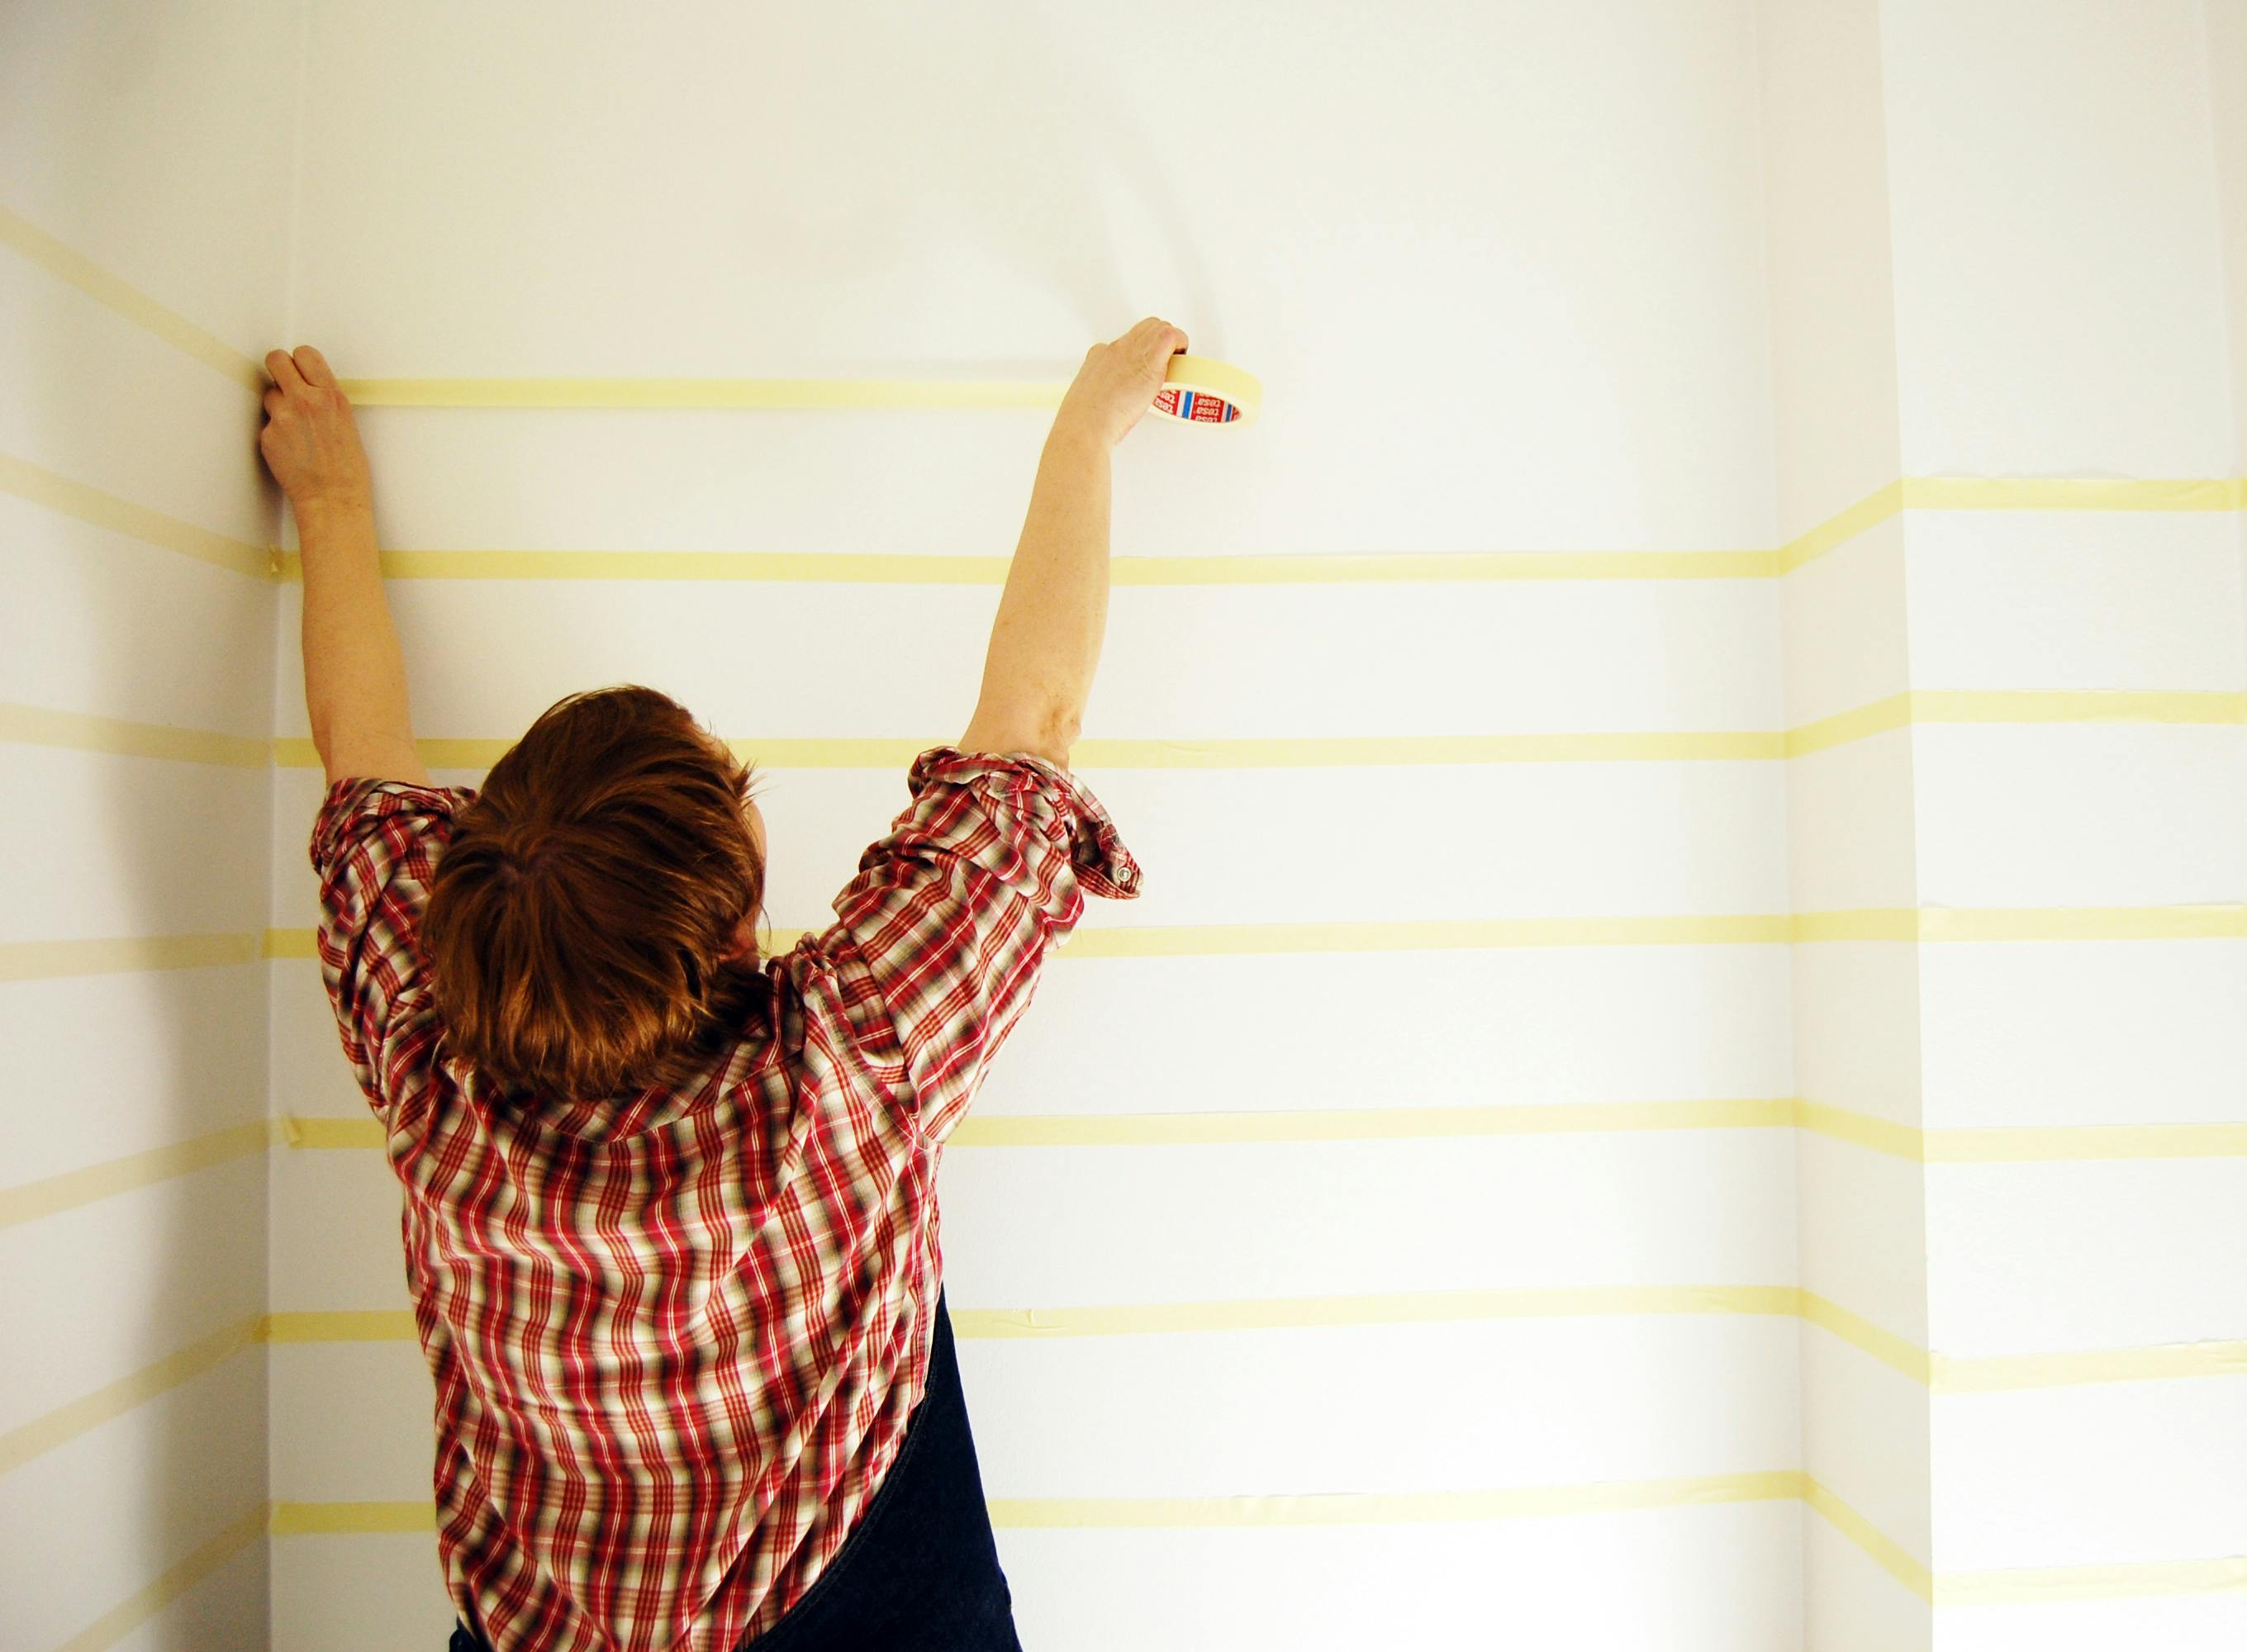
2. TAPE YOUR WALL
Begin creating lines to guide your pattern using masking take. Top tip: cut out a piece of cardboard or paper to your sponge measurement (in our case, 15cm), so you don't have to use a ruler each time!
Start with the bottom row without tape, then measure 15cm above this and tape it. Repeat the process for another 15cm until the whole surface area is taped.
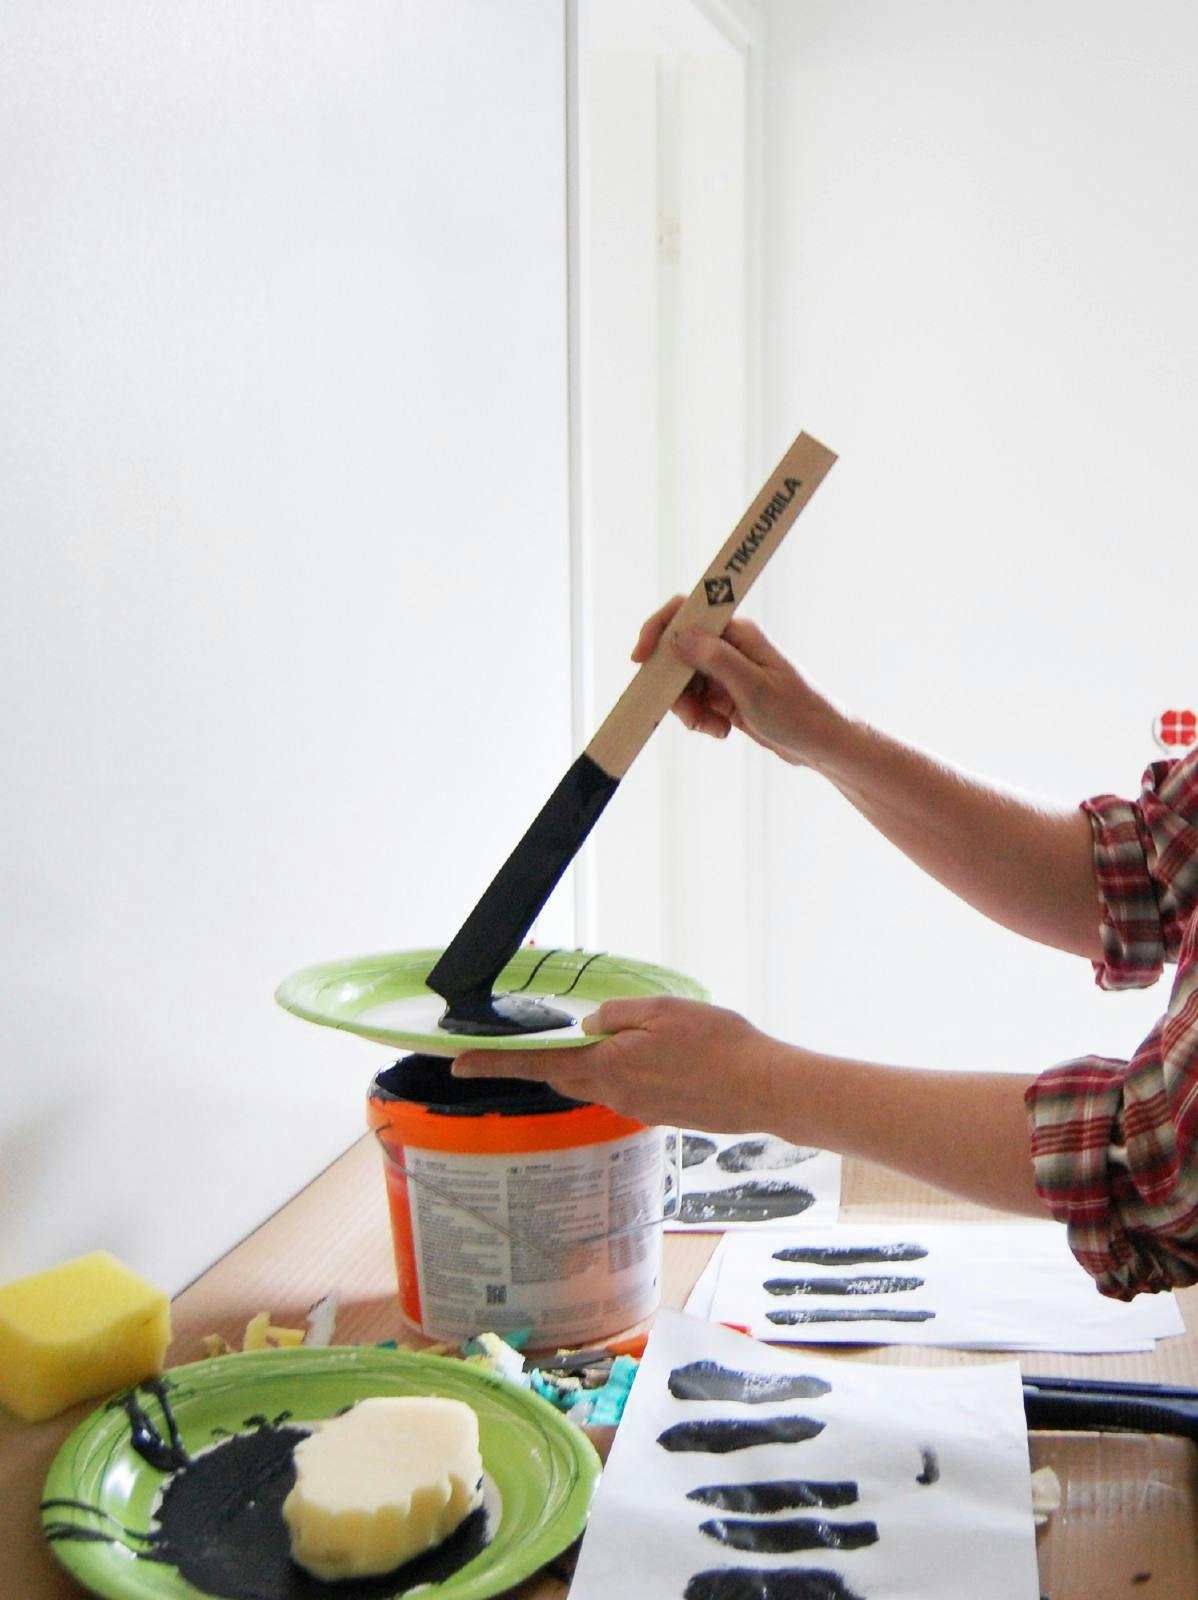
3. TEST YOUR SPONGE PATTERN
Open your black paint tin (in our case, Luja in Shade Y498 Midnight). Stir the product, and pour into a roller tray.
Take your sponge and dip it into the roller track to cover one side. Begin by testing the application on paper first, to ensure you are happy with the shape and overall effect. Trim or cut the sponge to tweak the shape.
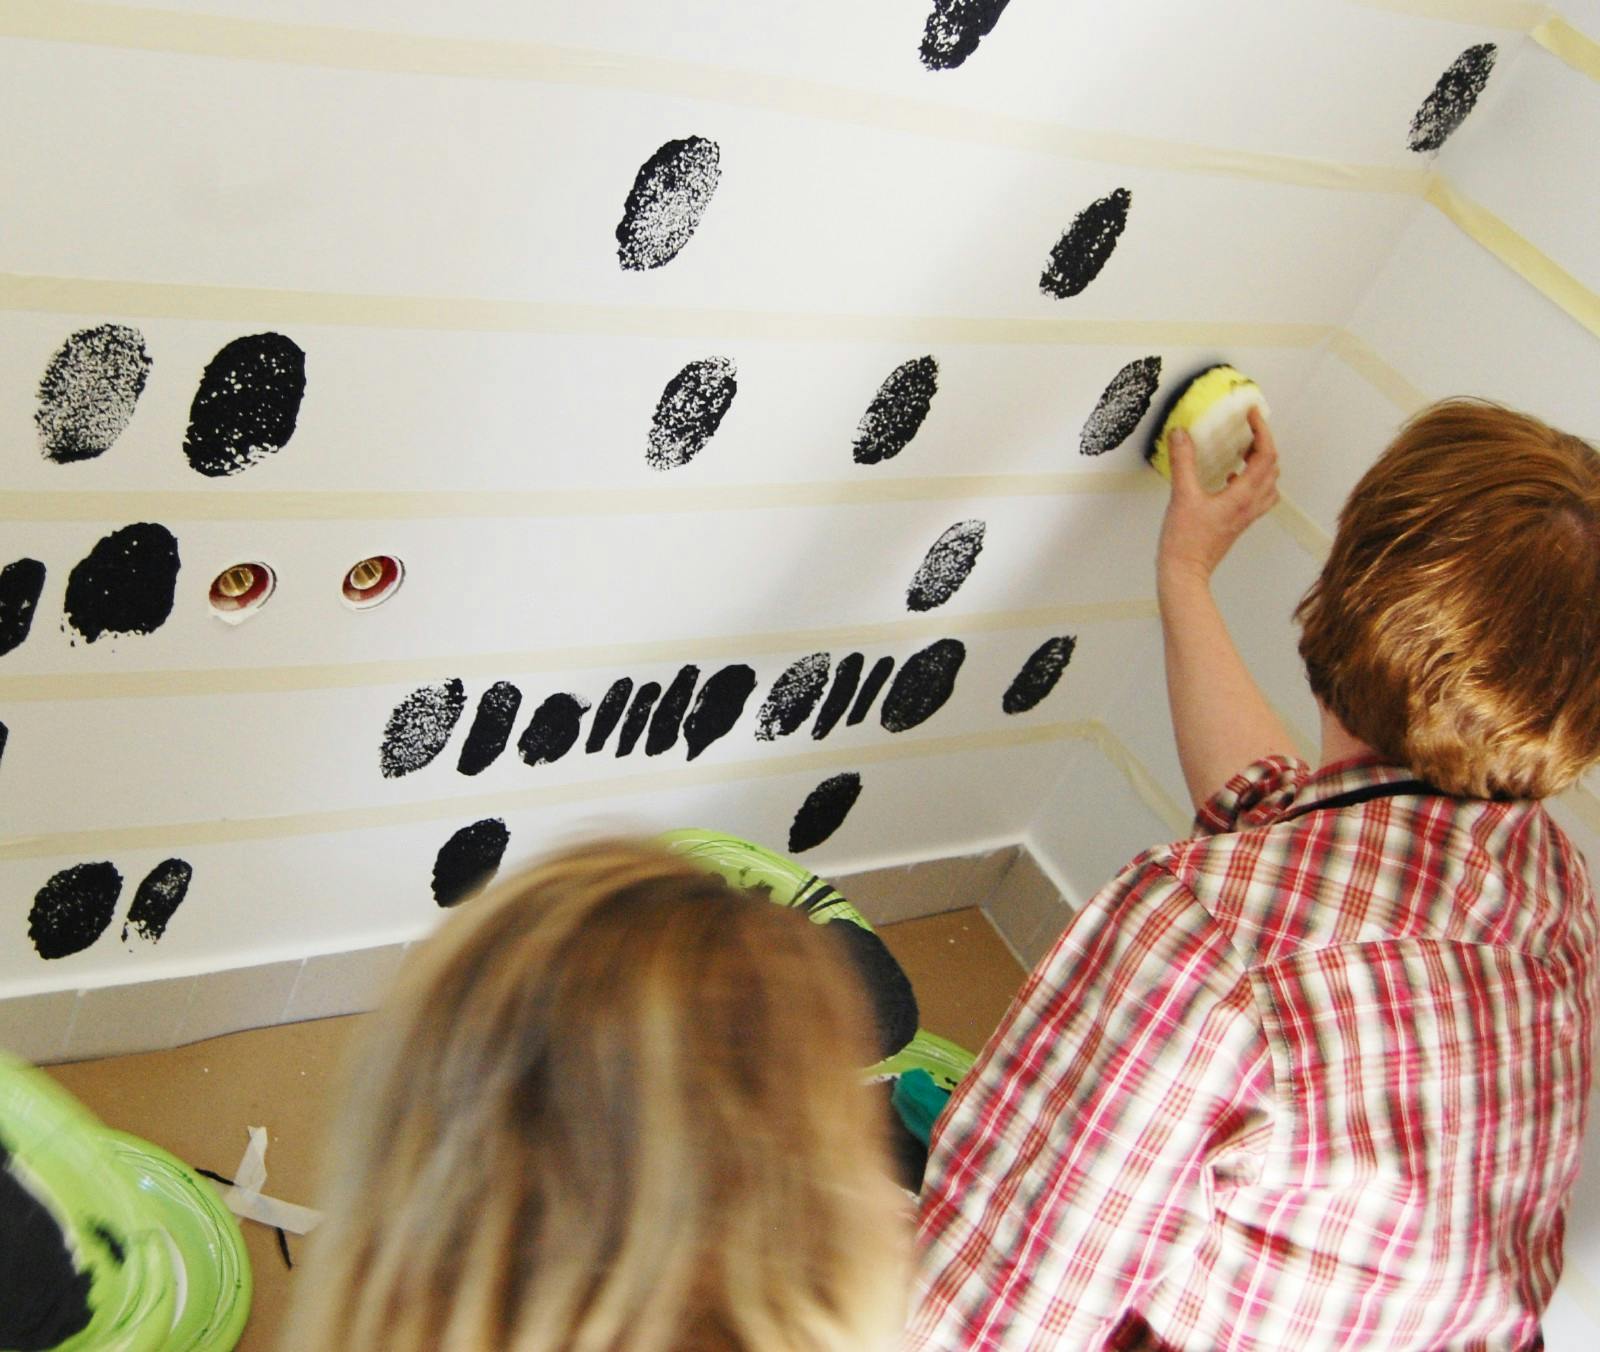
4. BEGIN APPLYING YOUR PATTERN TO THE WALL!
To make the pattern, press the sponge against the walls. Create patterns of various sizes using different sides of the sponge, depending on your preferences.